Create/Add/Remove Level Objects
Documentation for Unity Asset Store versions v1.10, v1.20, v1.22 and v1.30
Physics properties of the 'LE_Object':
Take into account that all level objects must have a collider attached (at root or in children). Without colliders a level object cannot be selected in the edit mode. If you need an object without colliders in the game mode then consider creating a script that will destroy the collider when the level is loaded in play mode.
When you have finished your new level object you need to create a prefab of it (simply drag and drop it into your project). Be aware that all level object prefabs must be placed in a resource folder otherwise it would be impossible to load them on runtime.
Once you have created a new object map you will need to add your level object to it. When the 'Icon Path' is not specified. Then you will see an error message telling you that you need to render the object icon. If you use the free version of the Unity Editor then it will be likely that you will see an error message in the console when you click on the 'Render Missing Icons' button. Simply click the button again and everything should work fine on the second try. The level object icon will be generated from Unity's preview image. The level icon will be placed in the same resource folder as the level object, but into another subfolder. Simply type the name of the level object in the search field and you will find a texture with the same name.
Summary
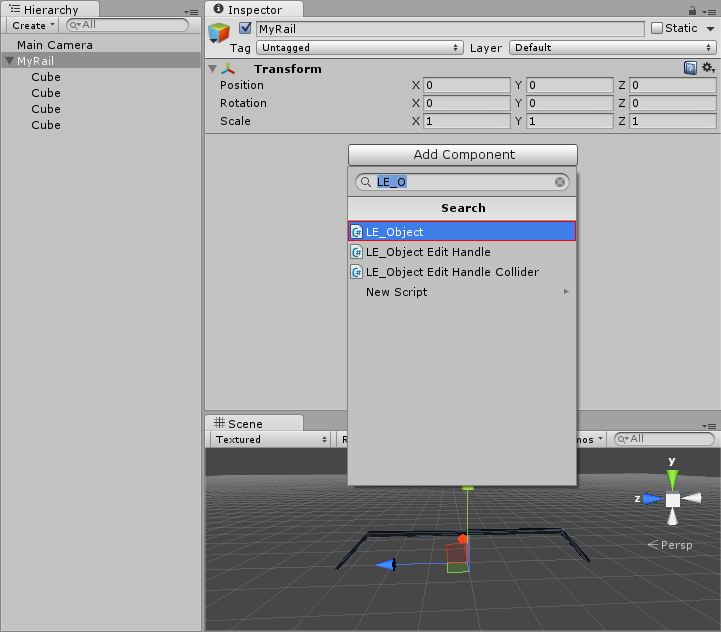
To add a new object to your level editor you have to attach and setup a 'LE_Object' script to your new object. Then you have to add the new level object to the object map hierarchy in order to make the object appear in the object selection of the level editor.Step 1: Create LE_Object
To add a new level object to your level editor select the root of your new object and add a 'LE_Object' script to it.
Step 2: Setup LE_Object
General properties of the 'LE_Object':
|

|
- Is Sleeping On Start: if true and a rigidbody is attached to this object or its children then all attached rigidbodies will go into the sleep state (Rigidbody.Sleep()) when the level is loaded. This will increase performance in the first few frames if you level has many rigidbodies. For example if you have a pile of crates you don't want them to fall down before the player touches them, therefore you will want them to sleep. However, if you have a huge snowball that has to roll behind the player you will probably not want to send it to sleep.
- Is Sleeping On Start Editable: When this object is selected in the editor then a property is presented to the end user that allows to change 'Is Sleeping On Start' if this property is true.
- Level Streaming Enabled: if this property is true then this object will be instantiated only if it is closer to the 'Main Camera' than the given instantiate distance. This way a level can be loaded stepwise. Additionally, performance is improved by destroying this object when it is further away from the camera than the given destroy distance.
- Update Frequency: defines the number of skipped frames between streamed object state updates. A low value should be used for fast games. However a low value (e.g. '0') will have performance implications if the number of streamed objects is very high (>300). A slow game can have a higher value. The value of '15' (with 30 FPS in average) means that streamed objects will be checked twice in a second which is fast enough for slow games.
- Instantiate Distance: this object will be instantiated if it is closer to the camera than the given distance. This value is used ingame.
- Destroy Distance: this object will be destroyed if it is further away from the camera than the given distance. This value is used ingame.
- Instantiate Distance(Editor): this object will be instantiated if it is closer to the camera than the given distance. This value is used in the editor.
- Destroy Distance(Editor): this object will be destroyed if it is further away from the camera than the given distance. This value is used in the editor.
- Cache Transformation: if this property is true then position, rotation and scale are cached when spawned objects are destroyed because they are too far away. The object will be instantiated with the transformation, which it had when it was destroyed, when it is close enough again.
- SNAP_DISABLED: by default the snapping feature is disabled.
- SNAP_TO_TERRAIN: object will snap to terrain every time the terrain is changed or the object is moved. If normal oriented placement is active then the object's orientation will be changed accordingly after every terrain change or object's position change.
-
SNAP_TO_OBJECT: in this snap mode it is possible to snap other objects to this level object.

- Snap Points: This array contains definitions of snap points for the 'Snap To Object' feature. A snap point defines the root location of the snap point and the objects which can be snapped to this point. The local transformation in the space of the point can be set for each snap object individually.
- Root Snap Point: if set to a value different from '-1' then the snap point at given index will be deactivated when this object is created through being snapped to another object.
- Built In UI: if set to 'true' then the built in UI for the snap object selection will be drawn. It uses the 'SnapToObjectUI' material from the resource folder.
-
SNAP_TO_3D_GRID: object can be placed only within the given grid on all axes.
- Grid Offset: Defines the offset of the snap grid.
- Grid Cell Size: Defines the cell size of the snap grid.
-
SNAP_TO_2D_GRID_AND_TERRAIN: object can be placed only within the given grid on the x and z axes. The y axis value is defined by the terrain.
- Grid Offset: Defines the offset of the snap grid.
- Grid Cell Size: Defines the cell size of the snap grid.
- NONE: by default the variation feature is disabled.
-
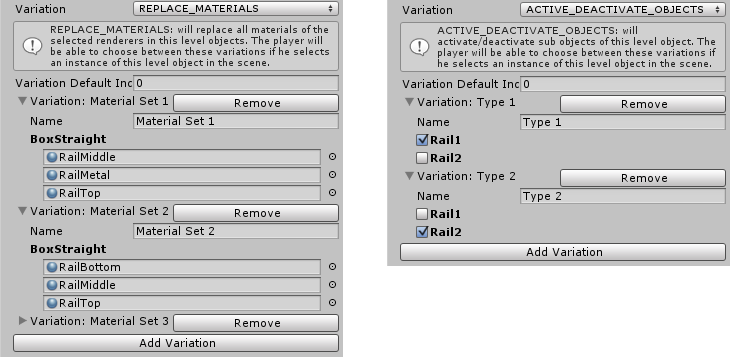
REPLACE_MATERIALS: will replace all materials of the selected renderers in this level objects. The player will be able to choose between these variations if he selects an instance of this level object in the scene.
- Variation Default Index: when a new object is placed in the scene, then the variation from the Variations property with the index Variations Default Index will be selected. This property is ignored if no variations or exactly one variation were provided for the Variations property.
- Name: the name of this variation. It will be shown to the player/user.
-
ACTIVE_DEACTIVATE_OBJECTS: will activate/deactivate sub objects of this level object. The player will be able to choose between these variations if he selects an instance of this level object in the scene.
- Variation Default Index: when a new object is placed in the scene, then the variation from the Variations property with the index Variations Default Index will be selected. This property is ignored if no variations or exactly one variation were provided for the Variations property.
- Name: the name of this variation. It will be shown to the player/user.

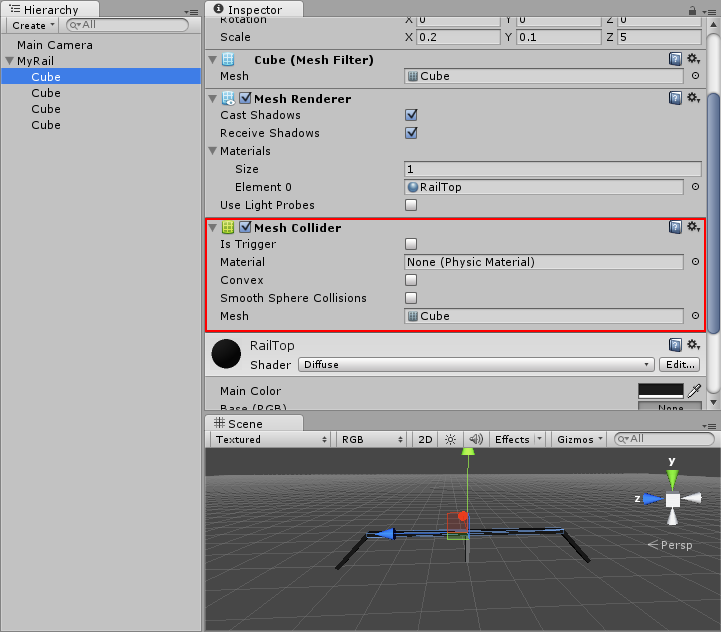
Take into account that all level objects must have a collider attached (at root or in children). Without colliders a level object cannot be selected in the edit mode. If you need an object without colliders in the game mode then consider creating a script that will destroy the collider when the level is loaded in play mode.

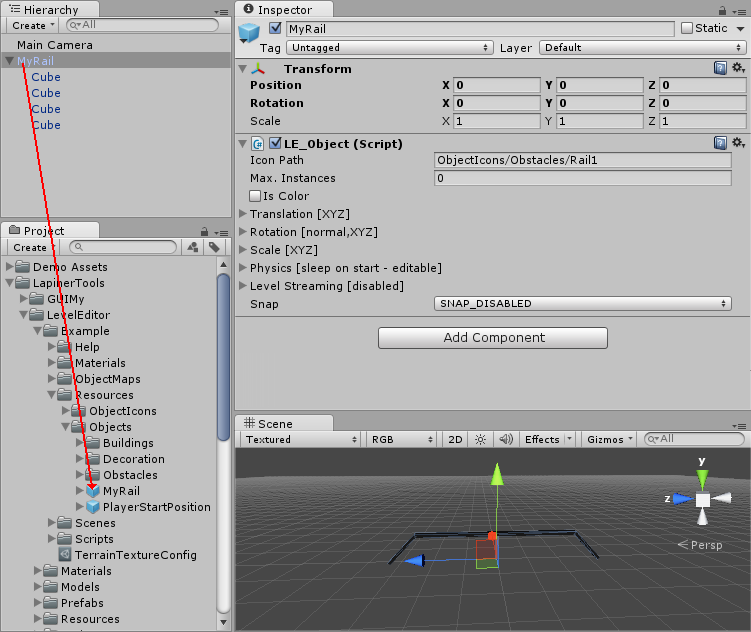
When you have finished your new level object you need to create a prefab of it (simply drag and drop it into your project). Be aware that all level object prefabs must be placed in a resource folder otherwise it would be impossible to load them on runtime.

Step 3: Add LE_Object To The Object Map
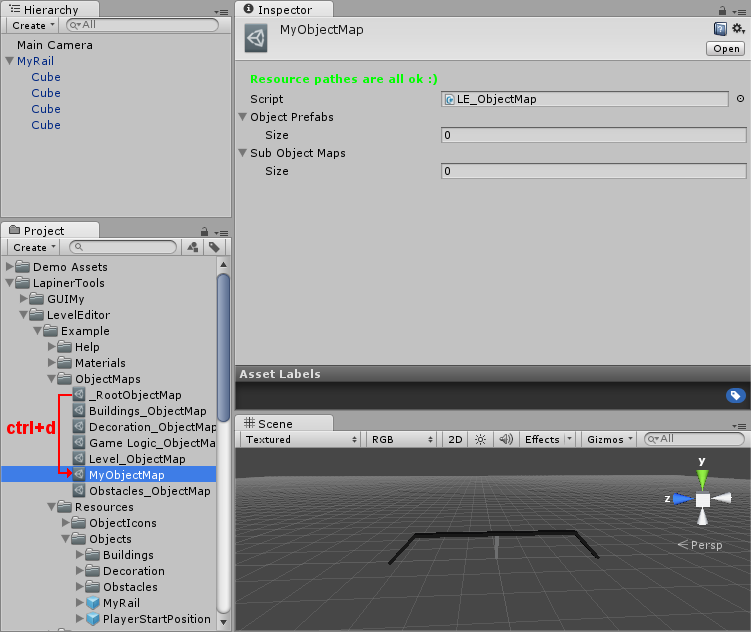
To make your new object appear in the object selection of the level editor you need to add it to an object map. If you want to create a new category of objects you will need to create a new object map. You can do this by duplicating an existing object map and removing all elemnts from the new object map. The name of the category will be the name of the object map. If the name of the object map contains a '_' then the name of the category will be the substring of the object map's name that is placed before the underscore.
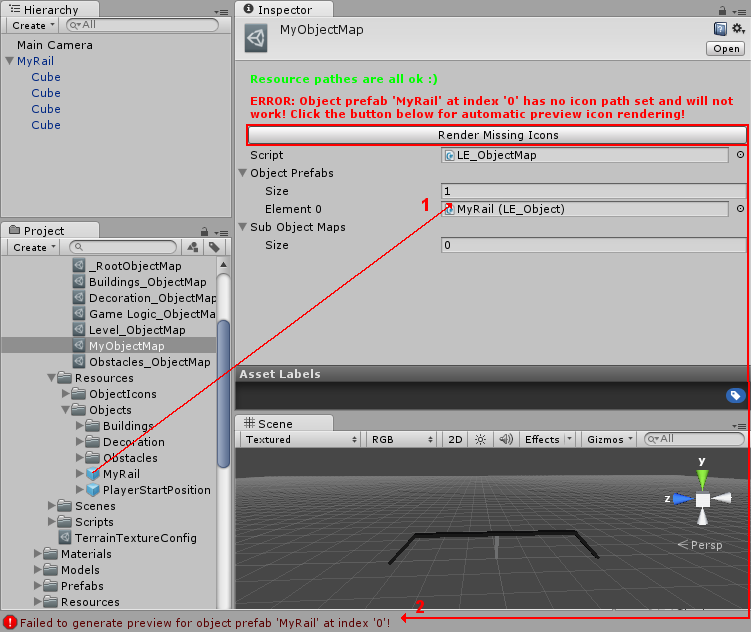
Once you have created a new object map you will need to add your level object to it. When the 'Icon Path' is not specified. Then you will see an error message telling you that you need to render the object icon. If you use the free version of the Unity Editor then it will be likely that you will see an error message in the console when you click on the 'Render Missing Icons' button. Simply click the button again and everything should work fine on the second try. The level object icon will be generated from Unity's preview image. The level icon will be placed in the same resource folder as the level object, but into another subfolder. Simply type the name of the level object in the search field and you will find a texture with the same name.

Step 4: Manage A Level Object Map Hierarchy
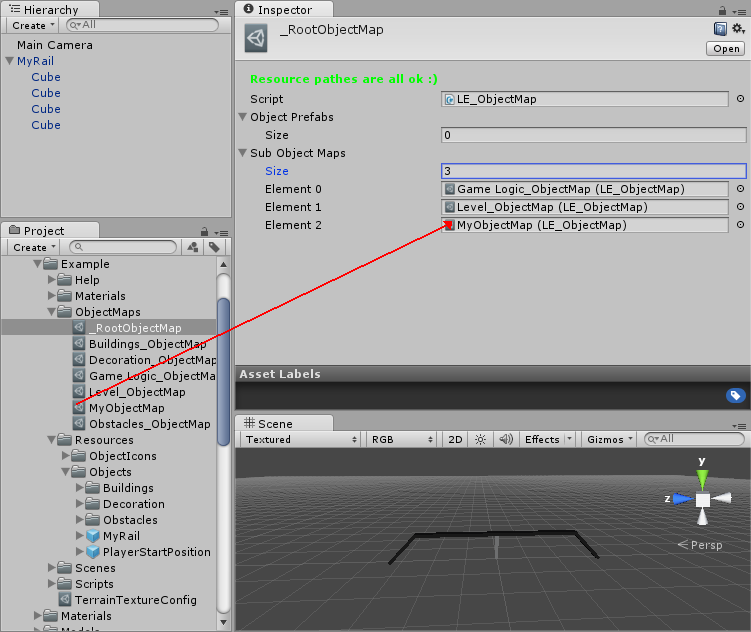
Your new object map is not included in the object map hierarchy yet and therefore you will not find your new object in the level editor object selection. In the example below we add the new object map to the root object map. Object maps can have other object maps as children (like the root object map), which makes them to inner nodes of the object map hierarchy. Leave nodes of the object map hierarchy are object maps that contain at least one level object. In this case other object maps attached to this object map will be ignored.


